Showing posts with label Miniature Quilts. Show all posts

Friday, 27 December 2013

Mini Candlewicked Quilt

I am culling my books as I seem to have amassed hundreds over the years, particularly from the 1980s and 1990s when candlewicking and heirloom sewing were the "IN" thing.  However, while I was rifling through the pages of each book in case there was something that would convince me to keep it, I noticed that a lot of the diagrams were either exactly 1/12th scale or near enough to 1/12th  that a little tweak on the computer  

 would fix it.  One book which fitted nicely into this category was "Traditional Country Needlecrafts" by Sue Millard published in 1993. This book is still readily available on the internet. Full of lovely, soft, romantic needlework projects which I never got around to making, it was destined for either the charity shop or the bin until I spotted some diagrams which could be adapted to dolls house size very easily. In particular, there was a double bed sized candle-wicked quilt with the added advantage of  full-size diagrams meant for tracing onto calico and which could be used as inspiration for the tiny squares.  This is one occasion when a magnifying glass or one of those "Mag-eyes" which fit on your head is a must!!  Another absolute MUST with this project is an embroidery frame or hoop to keep the fabric taught while you are stitching.

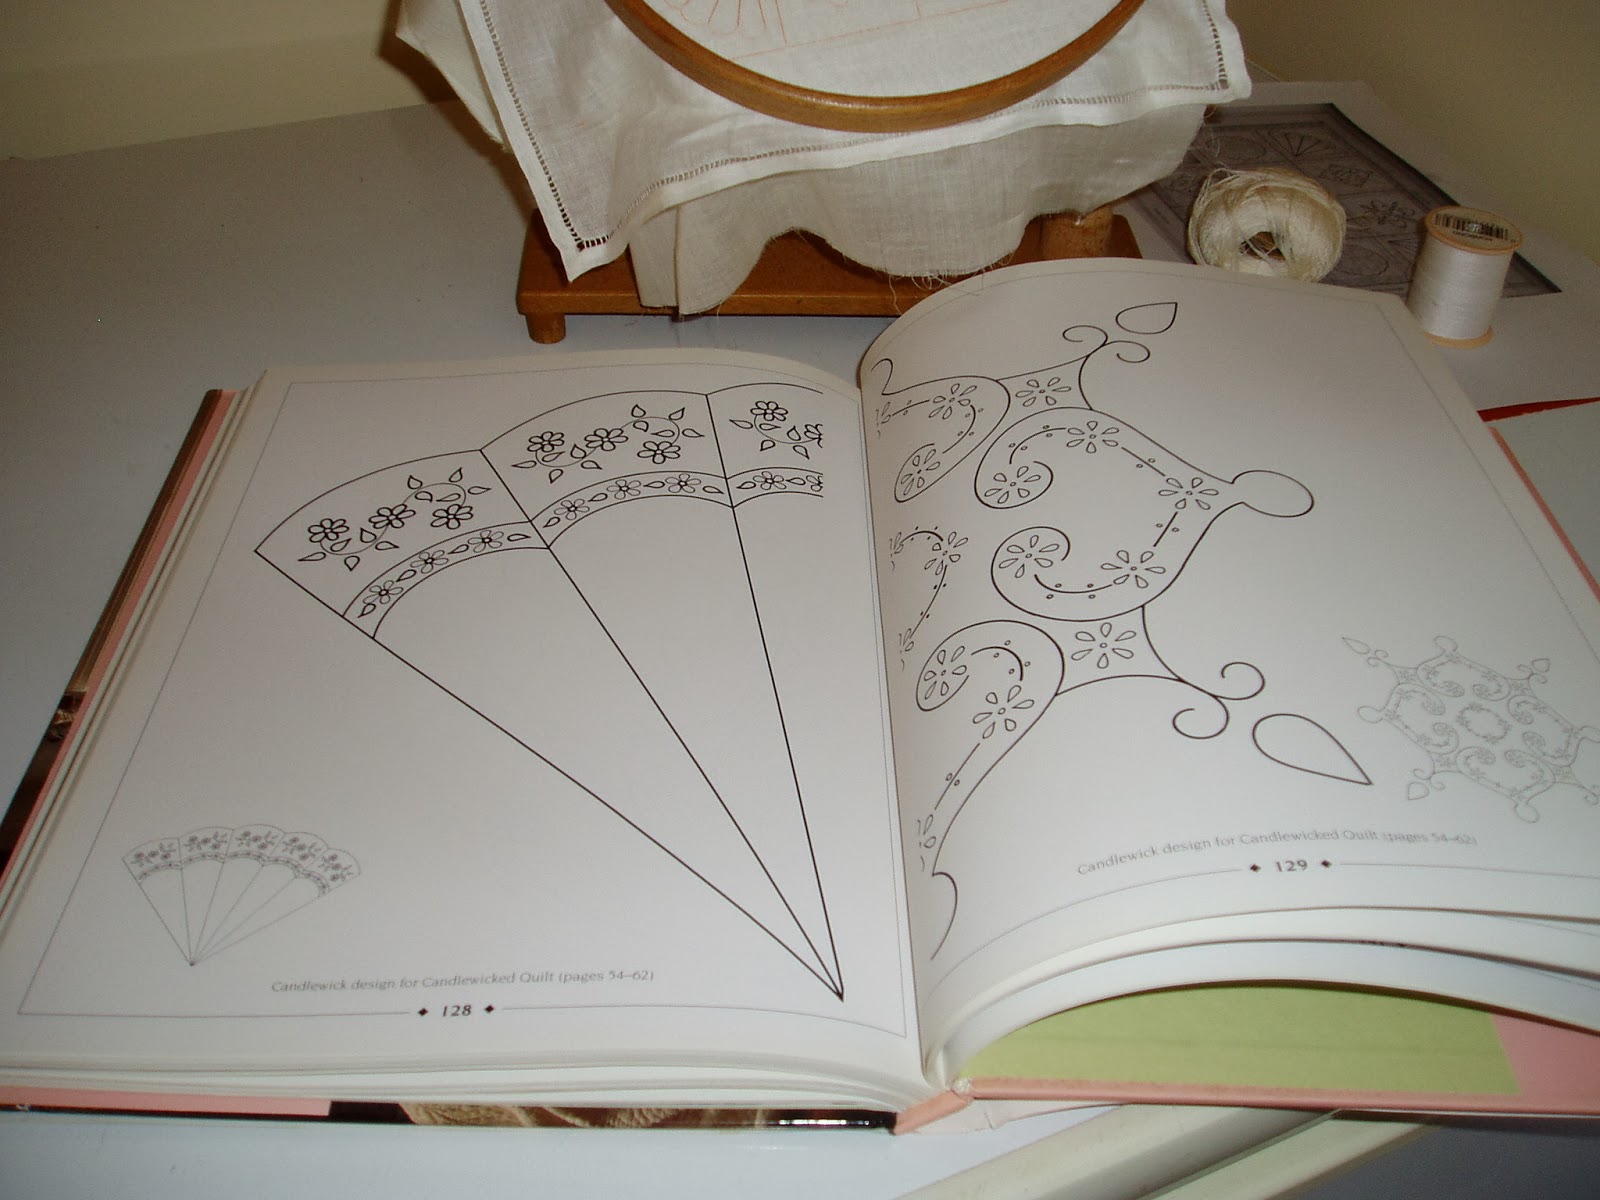
Here is my first lot of equipment showing the book, embroidery hoop on a frame, pattern for the quilt top which I have traced onto an ivory coloured linen hankie which has been stretched over a piece of cream voile and a piece of thin wadding in the hoop.  First of all I scanned the pattern in the computer and tweaked it so that it was the correct size for my mini bed, printed it out on a black and white printer and then copied it onto the hankie using dressmaker's carbon paper.  I couldn't find the sheet of yellow which would have been better so I used the orange colour.......would you believe it but when I was searching through the Christmas decoration box, I found the yellow but it was too late then.  I have no idea why it was there, maybe I had been carbon-copying some decorations or something many moons ago???? It is now in the drawer with the other sheets so next time I know exactly where to look.

This is the diagram as it is printed in the book.

Here is the book, the b&w printed page (notice how I have enlarged the diagram to make it the size that I needed for my dollshouse double bed), the fabric in the hoop and theads.  In this case, I am using a ball of very fine cream crochet cotton - J & P Coats size 100.

A close-up  photo of the design for the candlewicking in the hoop.  I have an ivory linen handkerchief on the top, a piece of cream voile beneath it and a piece of thin wadding at the bottom. 

This is the full-size design from the book which gives detailed drawings of each square.  Obviously in the tiny 1/12th scale, a lot of the embroidery is going to have to be omitted and the designs used for inspiration only.  Once I have finished the quilt, I will post a tutorial on how to make it.


Thursday, 7 November 2013

Miniature Owls baby quilt finished

This quilt measures 3 3/4 inches x 3 inches (9.5cm x 7.5cm).  The quilting part was fine but getting the folded edge straight was difficult because of the small size. To the naked eye it looks straight but blown up on the computer ........ oh dear!  Still it looks alright with a hanging sleeve at the back and a rod (cut down satay stick) threaded through it.  I had to make the sleeve and rod because the quilt is glued onto a side wall so you can see the side of it and it would have looked a bit silly glued to the wall with no apparent way of hanging it in real life.


Wednesday, 6 November 2013

Crazy Quilt Bed Quilt

I have been asked if I would move my crazy quilted bed cover from my old blog to my new one seeing as it comes under the umbrella of "tiny textiles".  I can copy it to here and it will be in both places.  So far, I haven't attempted another one of these although I am working on a cream-on-cream one.  Other things keep getting in the way though. Anyway here is the quilt copied from the old blog, heading and all.

Dolls House Size Crazy quilt

Today I finally finished the 1:12 scale crazy quilt that I have been working on for the last two or three weeks.  The whole quilt measure 8 1/4 inches x 7 inches or 21cm x 17.5cm and there must be at least two hundred tiny patches, I haven't counted them all.  Each one is embroidered around all sides just like in a real crazy quilt and the tiny black edging finishes it all off.  The edging was one that I bought in England when we were there two years ago but it was sky blue, so taking up my husband's suggestion, I dyed it black and then slip-stitched it around the edges of the lined quilt once it was dry. I am posting this to both my crazy quilting blog and my doll's house miniature blog because it fits them both.  The straight edge is the top while the curved bottom edge is designed to go down the end and sides of a four-poster bed.
 
I used the stitch and flip method of piecing the tiny patches by hand, using  a  3 mm or 1/8 inch seam and tiny running stitches.


This is a close-up of the bottom right hand corner showing some of the decorative motifs such as a butterfly, Rose spray and fan.


Tuesday, 5 November 2013

Quick and Easy Quilted Wall Hangings

My sister is a quilter and makes the most gorgeous wall hanging quilts therefore I wanted to add a couple of quilts to her Nursery Room Box.  The thought of joined hundreds of tiny pieces of material together gave me the heebie-jeebies so I tried this quick and easy method. I'm not sure if it is totally legal but I am not planning on selling them or otherwise making money from them so I hope it is OK.  I looked on the internet images for baby quilts and found a few that I thought my sister would like so I copied and pasted them to Microsoft Publisher.  A Microsoft Word document would do just as well.  Here is the page that I saved......

A selection of four quilts which I figured Sue would like the best from the 100s on the internet.  These are placed on an A4 sheet and when printed out were the perfect size for 1/12th scale wallhangings.  Each one is roughly half of the width of A4 plus borders. This was not a particularly economical way of doing it because I can see that I could have got at least one more quilt on the page but I was raring to go.......


Once I was happy with the results, I printed the page out onto a sheet of fabric attached to paper (I bought a commercial packet of fabric sheets). Then I pulled the paper off the back and cut out the four quilt panels leaving a border around each one.    Here is the finished quilt ready to hang on the dolls house wall.

After I had completed the quilting around all of the lines (including the ark, water and palm trees), I hand-stitched a strip of striped border fabric along one side, cut back the excess fabric and wool felt to 2mm from the stitching line and turned the border fabric over to the back where I glued it down firmly leaving the small striped border at the front.  I worked on one side at a time, stitching, cutting off the excess, folding it over and glueing to the back.   It measures 4 inches or 10cm square and looks just like the real thing.