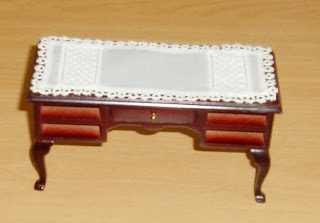
TUTORIAL for Stitching a Sideboard Runner
This runner is designed to fit my dolls house dining-room
sideboard which measures 12cm x 5cm. The
finished size of the runner will be exactly the same as the sideboard top
however without the lace edging it would be narrower.
MATERIALS:
1.
A cotton or linen handkerchief or scrap of white
material big enough to cover the top of the sideboard
2.
10cm
length of cotton insertion lace
3.
30cm length of narrow cotton lace or edging
4.
White cotton thread and a very fine needle with
a small eye
5. Fabric Glue
METHOD:
a.
From the handkerchief or scrap of material cut a
strip of fabric measuring 11cm x 5cm.
b.
Then cut 2.5cm piece off each end of the strip
so that you finish up with three pieces of material measuring 5cm x 2.5cm; 5cm x 6cm;
5cm x 2.5cm
c.
Cut the insertion lace into two pieces each 5cm
wide
d.
Lay them out in this order
a.
Starting with the middle piece of material, draw
out a thread close to each end and each side and cut along those lines to make
sure that the fabric is cut dead straight.
b.
Turn a 2mm turning along one end of the centre
piece and fold one side of the insertion lace to the back, making the turning
very close to the machine hem-stitching.
With right sides together, whip stitch the two together
keeping the stitches small and even and close to the edge of the fabric, in
fact the stitches should only catch two or three threads of material.
WHIP STITCH: 
Once the whip stitching has been
completed, carefully cut the excess fabric back to the stitching making sure
that you do not cut the actual stitches. Trim back the excess fabric on the
insertion lace as well. Using the point
of a pin, smear a tiny bit of fabric
glue along the edges of the stitching to prevent them fraying.
Lay the sewn runner onto the top of the table top or
sideboard and trim it back so that it is exactly the same size. I had to cut 5mm off each end to make mine
fit. Then turn over a three mm double
fold hem around all four sides. Hem
stitch the hem down with tiny stitches which only take up two or three threads
of the fabric.
F Finally,
slip stitch the lace trim around the edges.
At this point, the runner can be left plain, have lace sewn on the two
ends only or the lace can be sewn around all four sides as in my sample. I found the tiny edging around the edge of
another cotton handkerchief and unpicked just enough to go around my
runner.
A nd here is the runner on the sideboard and then complete with the Christmas Punch, Christmas cake and Trifle.
 |
| Finished runner on the sideboard. The drawers have been removed while I was carrying it from one room to another. |


No comments:
Post a Comment