Tutorial for Reversable Six Panelled Fussy Cut Christmas Tree Skirt
This tutorial covers the construction of a six panel Christmas Tree skirt using the "fussy cut" method of patchwork. Obviously, the pattern on the fabric needs to be small enough to fit within a wedge of the tree skirt. Absolute accuracy is important or the tree skirt will not sit flat in a complete circle (ask me how I know!! The first time I made this, I just held the template onto the fabric with my fingers and cut out the wedge. Then I stitched it with the sewing machine with an 'eye-balled' 2mm seam. All wrong!!
Materials:
30cm of two different patchwork fabrics with a tiny pattern of individual motifs
25cm x 9mm ribbon
30cm narrow gimp braid
Compass to draw the circle onto card
Small piece of clear plastic or patchwork template plastic big enough to cover the wedge
A5 size piece of card
Permanent ink fabric pen - you don't want ink leaking into your fabric when you iron it later.
Ruler
Matching threads and fine needle
Clear fabric glue
Directions:
Decide what size tree skirt you need, set the compass with the desired radius and draw a circle. My circle had a 4cm radius. Starting at a point on the circle, mark six points with the compass still set with the 4cm radius and rule lines across the circle to create the six wedges.

Lay the template plastic or clear plastic over the circle and trace over a single wedge shape. Cut it out accurately as this will be your template for cutting the fabric. The mark in the centre of the upper wedge is where I placed some double sided sticky tape to stop the plastic slipping while I traced along the lines and curve. Mark the wedge across from point to point across the bottom and from the centre point to the middle of the curve (see photo below). This will make the repetitive placing of the motif easier so that each wedge is exactly the same.
Use the plastic wedge template to correctly place the wedge over a repeat pattern on the wrong side of the fabric. Notice how I have lined the centre line along the line of the tree trunk each time with the bottom of the tree trunk sitting directly on the horizontal line. Trace around the wedge with the permanent ink fabric pen and cut out the fabric exactly on the traced lines.

Trace and cut six wedges from both pieces of fabric, making sure that the motif is centred in exactly the same place in the wedge every time. Then measure a 2mm seam allowance down both sides of each wedge and rule the line with the pen again. Don't guess or eye-ball this - measure and rule the line and get it right, otherwise like my first attempt, it will end up in the bin.

Thread the needle with matching thread - dark green for the Candy Cane tree skirt and cream for the Christmas tree skirt and stitch each seam with a tiny running stitch. The seams are too narrow for machine stitching, the tiny running stitch is much more accurate. Stop stitching about .5 cm from the point as this will be cut off later.
Stitch five seam, leaving the sixth seam free for the opening of the tree skirt. Press the skirt with all seams facing one way. Do not cut the points away at this stage as the longer they are left intact, the less chance there is of them fraying.
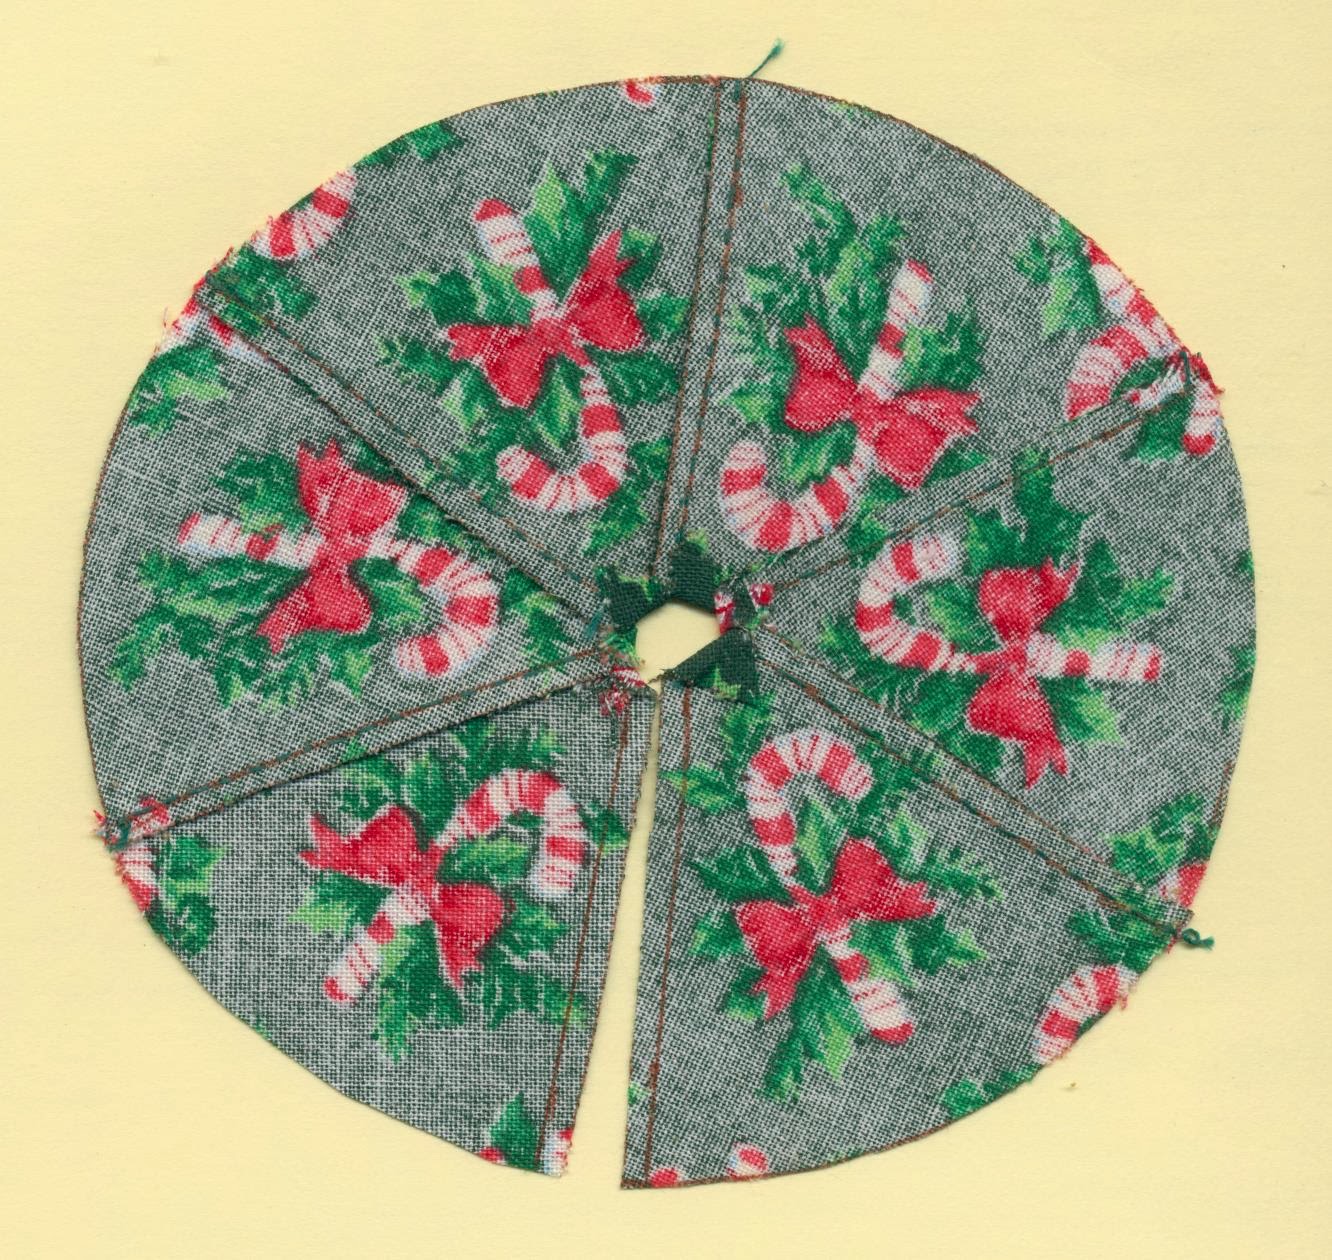

The back of the circle of wedges showing the points that have not been sewn. Once the second circle is completed, press the seams in the opposite direction to the first one.
With right sides together and starting .5cm down from the top of one straight open side stitch down the side and around the bottom curves with the same tiny running stitches as before, matching the seams between wedges then stitch up the other straight side, stopping .5cm from the top. Snip the excess point away from the bottom corner of each of the straight seams. Smear a tiny bit of glue around the outer edge of the circle to stop it fraying. When the glue is dry, carefully turn the circles inside out to the right side and finger-press the bottom edge smooth. This part is a bit fiddly as the only opening to turn the skirt inside out is through the tiny area in the centre where the six points have been left open.

Once the tree skirt has been turned to the right side and pressed, cut away the excess points at the top of each wedge on both skirts and stitch a row of running stitches around the central opening.

Slip-stitch the gimp braid around the edges of the tree skirt, leaving half of the braid showing over the edge then turn the skirt over and slip-stitch the braid down around the other side. Put a little bit of fabric glue on the ends of the gimp to stop it unravelling while you attach the ribbon to the centre.
sli

Take the length of ribbon, slip-stitch around the central hole, leaving an equal length of ribbon at each end for tying a bow. Turn the ribbon over to the other side and slip-stitch it down again. Wrap the skirt around the Christmas Tree base and tie the bow at the back.

No comments:
Post a Comment